
Access from iPhone
The instructions provided in this section were verified against iOS 13.5.
To set up a mail account on an iPhone manually:
-
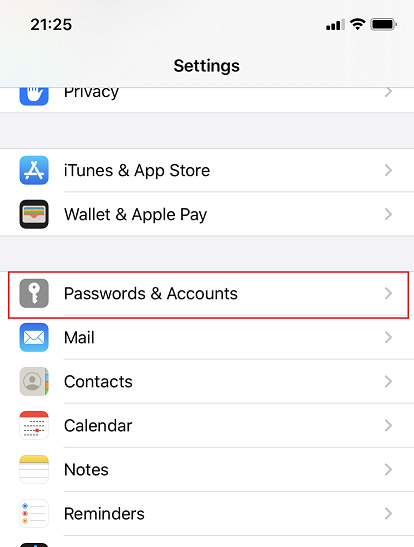
Go to Settings > Password & Accounts.
-
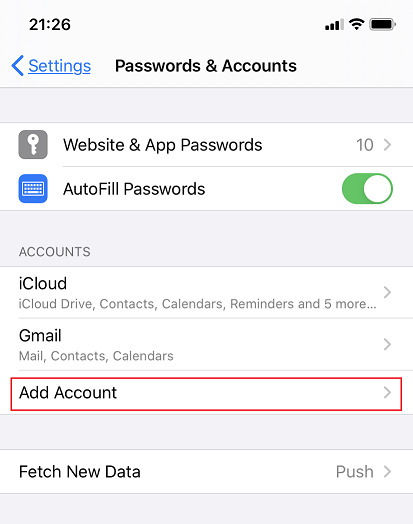
Tap Add Account.
-
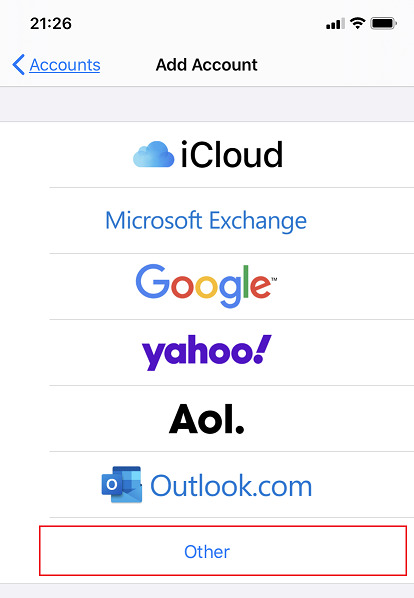
In the displayed list of email providers, select Other.
-
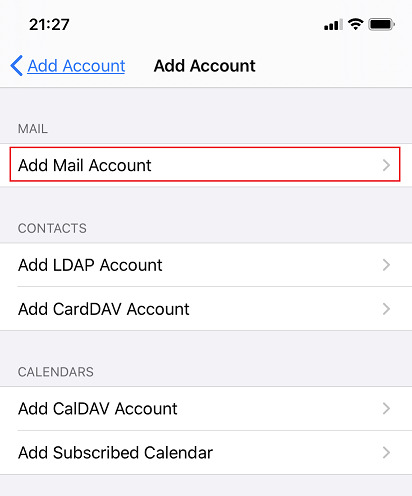
Tap Add Mail Account.
-
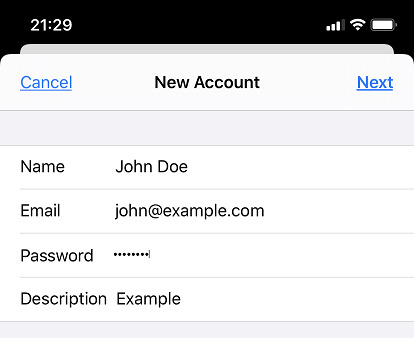
On the New Account screen, enter the following information and then tap Next:
-
The name that will be displayed in your emails.
-
Your full email address, for example, john@example.com.
-
The password of your email account.
-
(Optional) Your account description.
-
-
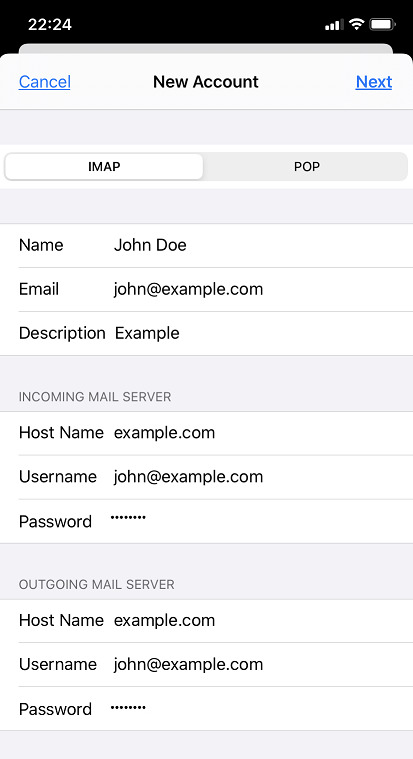
To keep the copies of email messages on the server, tap IMAP at the top of the screen. If you do not want to keep them on the server, tap POP. Then specify the details of your incoming and outgoing mail servers and tap Next:
-
Your domain name in the “Host Name” field, for example, example.com.
-
The name of your email account in the “Username” field, for example, john@example.com.
-
The password of your email account.
-
-
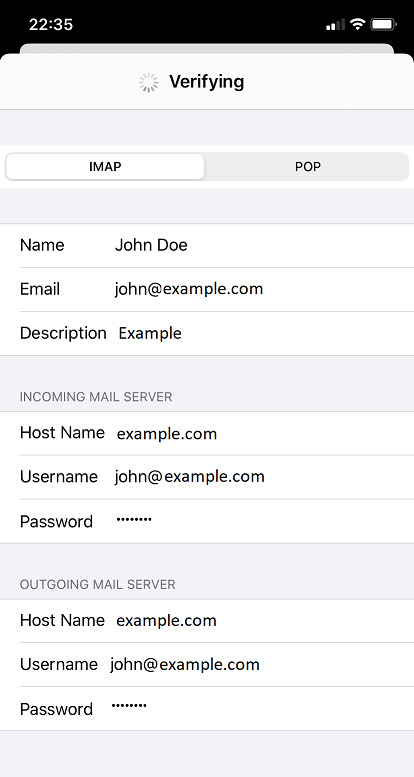
Once the email configuration is added, tap Save. The connection to the specified server will be verified.
-
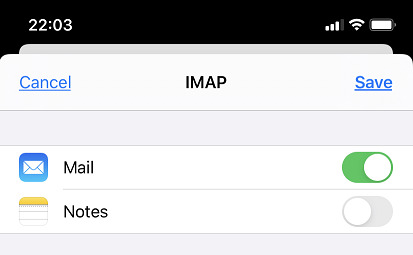
Once the connection is verified, choose what information you want to sync with your phone and tap Save.
-
Your iPhone will then verify your account information. Once it is finished, you will be taken to the “Mail” screen. Your account will now be listed in the Accounts section.
